Friday, October 29, 2010

Directories and its size for CentOS /Fedora /RedHat

which directories and trees take up all the diskspace?
du -sm $(find /start/dir/* -type d -maxdepth 1 -xdev) | sort -g

If you want more human readable output try:
du -ha /var | sort -n -r | head -n 10

you want to see ALL directories in the tree
find $1 -type d | xargs du -sm | sort -g

To show all directories size including sub directories, type

du -h

To calculate the current directory size you are in (-s stand for summary)

du -sh

To show all the 1 level sub directories size (which you are not interested at sub sub directories.)

du -sh *

To show the size of specific directory

du -sh /home

To show the size of all sub directories of a specific directory

du -sh /home/*

Thursday, October 28, 2010

Setup private cloud computing on Cent OS Eucalyptus 2.0

Eucalyptus is software that implements scalable IaaS-style private and hybrid clouds. The Eucalyptus architecture is highly modular with internal components consisting of Web services, which make them easy to replace and expand. Eucalyptus' flexibility enables it to export a variety of APIs towards users via client tools. Currently Eucalyptus implements the Amazon Web Service (AWS) API, which allows interoperability with existing AWS-compatible services and tools. This also allows Eucalyptus users to group resources drawn both from an internal private cloud and external public clouds to form a hybrid cloud.


#yum install -y java-1.6.0-openjdk-devel ant ant-nodeps libvirt-devel curl-devel httpd httpd-devel apr-devel openssl-devel dhcp libxml2 libxml2-devel gnutls gnutls-devel xen-devel libgcrypt-devel zlib-devel perl-Convert-ASN1 perl-Crypt-OpenSSL-RSA perl-Crypt-OpenSSL-Random chkfontpath scsi-target-utils fuse-libs swig gcc ntp

First, make sure JAVA_HOME is defined. For example, on Centos 5:
export JAVA_HOME="/usr/lib/jvm/java-openjdk/"
export JAVA="$JAVA_HOME/jre/bin/java"
 
reboot server in xen-kernel


  • run system-config-securitylevel-tui
  • select Security Level: Disabled
  • select OK
 
#vi /etc/xend/xend-config.sxp
(xend-http-server yes)
(xend-unix-server yes)
(xend-unix-path /var/lib/xend/xend-socket)
(xend-address localhost)
(network-script network-bridge)
(vif-script vif-bridge)
(dom0-min-mem 196)
(dom0-cpus 0)
(vncpasswd '')
download from http://open.eucalyptus.com/downloads


aoetools-21-1.el4.i386.rpm

eucalyptus-walrus-2.0.0-1.i386.rpm
euca2ools-1.3-1.i386.rpm

euca-rampartc-1.3.0-1.i386.rpm


euca-axis2c-1.6.0-1.i386.rpm

lzo2-2.02-3.el5.rf.i386.rpm

eucalyptus-2.0.0-1.i386.rpm

perl-Crypt-OpenSSL-Random-0.04-1.el5.rf.i386.rpm


eucalyptus-cc-2.0.0-1.i386.rpm

perl-Crypt-OpenSSL-RSA-0.25-1.el5.rf.i386.rpm


eucalyptus-cloud-2.0.0-1.i386.rpm

perl-Crypt-X509-0.32-1.el5.rf.noarch.rpm


eucalyptus-common-java-2.0.0-1.i386.rpm

python25-2.5.1-bashton1.i386.rpm


eucalyptus-gl-2.0.0-1.i386.rpm

python25-libs-2.5.1-bashton1.i386.rpm


eucalyptus-nc-2.0.0-1.i386.rpm

vblade-14-1mdv2008.1.i586.rpm


eucalyptus-sc-2.0.0-1.i386.rpm

vtun-3.0.2-1.el5.rf.i386.rpm


#yum localinstall eucalyptus*


Now start up your Eucalyptus services. On the front-end: 


/etc/init.d/eucalyptus-cloud start
/etc/init.d/eucalyptus-cc start
On the node:
/etc/init.d/eucalyptus-nc start
At this point you should be ready to go through the first-time
configuration. 
Point your browser to, https://front-end-ip:8443 Since Eucalyptus is using a self-signed certificate, your browser is likely to prompt you to accept the certificate. On some machines it may take few minutes after the starting of the Cloud Controller for the URL to be responsive the first time you run Eucalyptus. You will be prompted for a user and password both of which are set to admin initially. Upon logging in the first time you will be asked to
  1. change the admin password,
  2. set the admin's email address, and
  3. confirm the IP of the Cloud Controller host.
    #mkdir $HOME/.euca
    #unzip euca2-admin-x509.zip -d $HOME/.euca 
    
    #. $HOME/.euca/eucarc
  4. 
    

    Adding Images

    To enable a VM image as an executable entity, a user/admin must add a root disk image, a kernel/ramdisk pair (ramdisk may be optional) to Walrus and register the uploaded data with Eucalyptus. Each is added to Walrus and registered with Eucalyptus separately, using three EC2 commands. The following example uses the test image that we provide. Unpack it to any directory: #wget http://open.eucalyptus.com/sites/all/modules/pubdlcnt/pubdlcnt.php?file=http://eucalyptussoftware.com/downloads/releases/euca2ools-1.2-centos-i386.tar.gz&nid=3088 #cd euca-centos-5.3-i386
    #euca-bundle-image -i  --kernel true
    #euca-upload-bundle -b  -m /tmp/.manifest.xml
    #euca-register /.manifest.xml
    Next, add the root filesystem image to Walrus: #euca-bundle-image -i #euca-upload-bundle -b -m /tmp/.manifest.xml #euca-register /.manifest.xml Our test kernel does not require a ramdisk to boot. If the administrator would like to upload/register a kernel/ramdisk pair, the procedure is similar to the above: #euca-bundle-image -i --ramdisk true #euca-upload-bundle -b -m /tmp/.manifest.xml #euca-register /.manifest.xml
    
    
    :)

Sending mails from command line


Sending mails using mail:
mail (mailx is the newer version) is a fantastic program that can be used for sending email from command line or from within scripts.
The following example will send an email to admin@yeswedeal.com, with subject “Apache is down” and text “Please check Apache at host name of the server”
echo “Please check Apache at `hostname`” | mail -s “Apache is down” admin@yeswedeal.com
We can cat the contents of any text file, for example, log file and it will be sent to the recipient specified
cat “/var/log/apache2/error.log” | mail -s “Apache is down” admin@yeswedeal.com
To attach a file, other than a text one, we need to uuencode (unix to unix encode) it before sending
uuencode banner.jpg banner_out.jpg | mail webmaster@yeswedeal.com
The banner.jpg is the name of input file and banner_out.jpg is the output uuencoded file that we will be sent by mail.
To have text sent alogwith the attachment, we can cat or echo that text too
(cat /var/log/apache2/error.log;uuencode banner.jpg banner.jpg) | mail -s pic webmaster@yeswedeal.com

Sending mails from using mutt:
With mutt, its same as using mail.
echo “Please check Apache at `hostname`” | mutt -s “Apache is down” admin@yeswedeal.com
or we can cat the contents of a text file to show as body text
cat /var/log/apache2/error.log | mutt -s “Apache is down” admin@yeswedeal.com
OR
mutt -s “Apache is down” admin@yeswedeal.com
To send an empty body mail, use an empty line as the mail body:
echo | mutt -s “Software upgrades for `hostname`” admin@yeswedeal.com
To attach a binary file, its even easier with mutt, just use the -a option
echo | mutt -s “New logo for the company” -a logo.gif webmaster@yeswedeal.com

Wednesday, October 27, 2010

Linux Find FC ID WWNN of a disk/LUN


If your server is connected to more than two SANs of the same type it is really hard to find what disk is on what SAN and how it is connected to your server. You can get the Fiber Channel addresses of the HBAs by typing the following commands:
# systool -c fc_host -v
Type the following command to determine the fibre channel target WWN:
# systool -c fc_transport -v

Monday, October 25, 2010

Change location on Cent OS / RedHat /Fedora

[root@convirt kitbag]# tzselect
Please identify a location so that time zone rules can be set correctly.
Please select a continent or ocean.
 1) Africa
 2) Americas
 3) Antarctica
 4) Arctic Ocean
 5) Asia
 6) Atlantic Ocean
 7) Australia
 8) Europe
 9) Indian Ocean
10) Pacific Ocean
11) none - I want to specify the time zone using the Posix TZ format.
#? 5
Please select a country.
 1) Afghanistan          18) Israel            35) Palestine
 2) Armenia          19) Japan            36) Philippines
 3) Azerbaijan          20) Jordan            37) Qatar
 4) Bahrain          21) Kazakhstan        38) Russia
 5) Bangladesh          22) Korea (North)        39) Saudi Arabia
 6) Bhutan          23) Korea (South)        40) Singapore
 7) Brunei          24) Kuwait            41) Sri Lanka
 8) Cambodia          25) Kyrgyzstan        42) Syria
 9) China          26) Laos            43) Taiwan
10) Cyprus          27) Lebanon            44) Tajikistan
11) East Timor          28) Macau            45) Thailand
12) Georgia          29) Malaysia            46) Turkmenistan
13) Hong Kong          30) Mongolia            47) United Arab Emirates
14) India          31) Myanmar (Burma)        48) Uzbekistan
15) Indonesia          32) Nepal            49) Vietnam
16) Iran          33) Oman            50) Yemen
17) Iraq          34) Pakistan
#? 14

The following information has been given:

    India

Therefore TZ='Asia/Kolkata' will be used.
Local time is now:    Mon Oct 25 14:52:34 IST 2010.
Universal Time is now:    Mon Oct 25 09:22:34 UTC 2010.
Is the above information OK?
1) Yes
2) No
#? 1

You can make this change permanent for yourself by appending the line
    TZ='Asia/Kolkata'; export TZ
to the file '.profile' in your home directory; then log out and log in again.

Here is that TZ value again, this time on standard output so that you
can use the /usr/bin/tzselect command in shell scripts:
Asia/Kolkata

Installing Postfix Admin on Cent OS / RedHat / Fedora

1. Install the Postfix Admin requirements using the command below.
#yum install mysql-server php-mysql php-imap httpd postfix dovecot
 
2. Download the latest stable version of Postfix Admin in .tar.gz format. 
Assuming you got the file postfixadmin-2.3.2.tar.gz and it is located on your Desktop,
 type in the commands below to extract and to put it into its proper directory.
 
#tar xvfz postfixadmin-2.3.2.tar.gz
#mv postfixadmin-2.3.2 /usr/share/postfixadmin 
#vim /etc/httpd/conf.d/postfixadmin.conf
 
#
#  Web application to manage Postfix email server
#

Directory "/usr/share/postfixadmin"
Order Allow,Deny
Allow from all
Directory

Alias /postfixadmin /usr/share/postfixadmin
Alias /PostFixAdmin /usr/share/postfixadmin
Alias /PostfixAdmin /usr/share/postfixadmin

3. Edit the file /usr/share/postfixadmin/config.inc.php and update the following lines below.
$CONF['configured'] = true;
$CONF['postfix_admin_url'] = '/postfixadmin';
$CONF['database_type'] = 'mysqli';
$CONF['database_host'] = 'localhost';
$CONF['database_user'] = 'postfix';
$CONF['database_password'] = 'your_password';
$CONF['database_name'] = 'postfix';
$CONF['domain_path'] = 'YES';
$CONF['domain_in_mailbox'] = 'NO';
$CONF['encrypt'] = 'cleartext';
$CONF['emailcheck_resolve_domain] = 'NO';

#service mysqld start

4.Launch the MySQL command line tool using the command below.
mysql -u root -p

The default root password of MySQL is a blank password. Next, create a 
new MySQL database for Postfix Admin using the commands below.
mysql> CREATE DATABASE postfix;
mysql> CREATE USER postfix@localhost IDENTIFIED BY 'your_password';
mysql> GRANT ALL PRIVILEGES ON postfix.* TO postfix;

#service httpd start
 
5.Go to the Postfix Admin setup page at http://localhost/postfixadmin/setup.php and fill in the setup password. Next, click the Generate password hash.
6.Get the generated setup password hash and put it into the file /usr/share/postfixadmin/config.inc.php. Next, fill in the Setup password, Admin and Password and Password (again). Finally, click Add Admin to create a new admin account.
7. Go to the Postfix Admin login page at http://localhost/postfixadmin/ and login using your newly created admin account.
 
:)

Fedora / Redhat / CentOS Install Memcached Caching System


How do I install memcached a high-performance, distributed memory object caching system, generic in nature, but intended for use in speeding up dynamic web applications by alleviating database load under CentOS / RHEL / Fedora / Redhat Linux?

Memcached is very fast caching system for MySQL. It uses libevent or epoll (Linux runtime) to scale to any number of open connections and uses non-blocking network I/O.

Required Packages

  1. memcached : High Performance, Distributed Memory Object Cache.
  2. memcached-selinux : SELinux policy module supporting memcached.
  3. perl-Cache-Memcached : Perl client for memcached.
  4. php-pecl-memcache : Php client / extension to work with the Memcached caching daemon.
  5. python-memcached : A Python memcached client library.

Step # 1: Turn on EPEL Repo

Type the following command to enable EPEL repo which carries required memcache packages.
rpm -Uvh http://download.fedora.redhat.com/pub/epel/5/i386/epel-release-5-3.noarch.rpm.

Step # 2: Install memcached

Type the following command to install memcached with php extension:
# yum install memcached php-pecl-memcache


Step # 3: Configure memcached Edit /etc/sysconfig/memcached, enter:
# vi /etc/sysconfig/memcached
Update it as follows:
PORT="11211"
USER="memcached"
# max connection 2048
MAXCONN="2048"
# set ram size to 2048 - 2GiB
CACHESIZE="4096"
# listen to loopback ip 127.0.0.1, for network connection use real ip e.g., 10.0.0.4
OPTIONS="-l 127.0.0.1"
The above will starts memcached up as a daemon, using 4GB of memory, and listening on IP 127.0.0.1, port 11211. Save and close the file.

Step # 4: Run memcached

Type the following command to start memcached, enter:
# chkconfig memcached on
# service memcached start

To stop / restart use the following commands:
# service memcached stop
# service memcached restart

How Do I See Memory Memcached Slabs?

Type the following command:
# memcached-tool IP_ADDRESS:Port
# memcached-tool IP_ADDRESS:Port display
# memcached-tool 127.0.0.1:11211


  #  Item_Size   Max_age  1MB_pages Count   Full?
  1     104 B     5134 s       1      10      no
  2     136 B     5135 s       1      40      no
  3     176 B        0 s       1       0      no
  4     224 B     2648 s       1       7      no
  8     552 B     1810 s       1      12      no
  9     696 B     1810 s       1       6      no
 10     872 B     2935 s       1       8      no
 11     1.1 kB    4262 s       1      18      no
 12     1.3 kB    2990 s       1      23      no
 13     1.7 kB    2434 s       1      22      no
 14     2.1 kB    3489 s       1      11      no
 15     2.6 kB    2964 s       1      16      no
 16     3.3 kB    2861 s       1      14      no
 17     4.1 kB    2076 s       1       5      no
 18     5.2 kB    2981 s       1       5      no
 20     8.1 kB      64 s       1       1      no
 21    10.1 kB    1865 s       1       3      no
 29    60.2 kB    1550 s       1       2      no

How Do I See Memory Memcached Stats?

Type the following command:
# memcached-tool IP_Address:Port stats
# memcached-tool 127.0.0.1:11211 stats


#127.0.0.1:11211   Field       Value
         accepting_conns           1
                   bytes      399395
              bytes_read      504797
           bytes_written    17313658
               cmd_flush           0
                 cmd_get        1141
                 cmd_set         248
   connection_structures           9
        curr_connections           5
              curr_items         205
               evictions           0
                get_hits         898
              get_misses         243
          limit_maxbytes  1073741824
     listen_disabled_num           0
                     pid       40159
            pointer_size          64
           rusage_system    0.227965
             rusage_user    0.034994
                 threads           5
                    time  1255803547
       total_connections         344
             total_items         259
                  uptime        5829
                 version       1.2.8

Sunday, October 24, 2010

Find out non-system users

alias lsusers='getent passwd | tr ":" " " | awk "\$3 >= $(grep UID_MIN /etc/login.defs | cut -d " " -f 2) { print \$1 }" | sort'
 
Above command to list non-system users. It should be portable though won't work on systems without the getent command.

Changing file extensions

#rename 's/.html$/.php/' *.html

This will change the extension of every .html file in your PWD to .php.

Friday, October 22, 2010

Configure AIDE

What is AIDE?

AIDE (Advanced Intrusion Detection Environment) is a free replacement for Tripwire. It does the same things as the semi-free Tripwire and more. There are other free replacements available so why build a new one? All the other replacements do not achieve the level of Tripwire. And I wanted a program that would exceed the limitations of Tripwire.

AIDE is not installed by default. Install it with the command:
# yum install aide

Customize /etc/aide.conf to meet your requirements. The default configuration is acceptable for many
environments.

Generate a new database:
# /usr/sbin/aide --init
By default, the database will be written to the file /var/lib/aide/aide.db.new.gz.
The database, as well as the configuration file /etc/aide.conf and the binary /usr/sbin/aide (or hashes
of these files) should be copied and stored in a secure location. Storing these copies or hashes on read-only
media may provide further confidence that they will not be altered.
Install the newly-generated database:
# cp /var/lib/aide/aide.db.new.gz /var/lib/aide/aide.db.gz
Run a manual check:
# /usr/sbin/aide --check
If this check produces any unexpected output, investigate. 

Implement checking with whatever frequency is required by your security policy. A once-daily check may be
suitable for many environments. For example, to implement a daily execution of AIDE at 4:05am, add the
following line to /etc/crontab:
05 4 * * * root /usr/sbin/aide --check

phpBB on CentOS /RedHat /Fedora

THE #1 FREE, OPEN SOURCE BULLETIN BOARD SOFTWARE
phpBB is a free flat-forum bulletin board software solution that can be used to stay in touch with a group of people or can power your entire website. With an extensive database of user-created modifications and styles database containing hundreds of style and image packages to customise your board, you can create a very unique forum in minutes.

Requirements

phpBB3 has a few requirements which must be met before you are able to install and use it.
  • A webserver or web hosting account running on any major Operating System with support for PHP
  • A SQL database system, one of:
    • MySQL 3.23 or above (MySQLi supported)
    • PostgreSQL 7.3+
    • SQLite 2.8.2+
    • Firebird 2.1+
    • MS SQL Server 2000 or above (directly or via ODBC)
    • Oracle
  • PHP 4.3.3+ (>=4.3.3, >4.4.x, >5.x.x, >6.0-dev (compatible)) with support for the database you intend to use.
  • getimagesize() function need to be enabled.
  • These optional presence of the following modules within PHP will provide access to additional features, but they are not required.
    • zlib Compression support
    • Remote FTP support
    • XML support
    • Imagemagick support
    • GD Support
If your server or hosting account does not meet the requirements above we are afraid phpBB3 is not for you.

#yum install  mysql mysql-server httpd php php-mysql php-gd php-imap php-ldap php-odbc php-pear php-xml php-xmlrpc phpmyadmin

#service httpd start
#service mysqld start
#mysql_secure_installation (set up root password)
#wget http://sourceforge.net/projects/phpbb/files/phpBB%203/phpBB%203.0.7-PL1/phpBB-3.0.7-PL1.zip/download
http://www.mydomain.com/phpBB3/install/

:D

Thursday, October 21, 2010

ERP, CRM, E-Business / E-Commerce, SCM, MRP, CMMS/EAM

The Apache Open For Business Project is an open source enterprise automation software project licensed under the Apache License Version 2.0. By open source enterprise automation we mean: Open Source ERP, Open Source CRM, Open Source E-Business / E-Commerce, Open Source SCM, Open Source MRP, Open Source CMMS/EAM, and so on.

  • advanced e-commerce
  • catalog management
  • promotion & pricing management
  • order management (sales & purchase)
  • customer management (part of general party management)
  • warehouse management
  • fulfillment (auto stock moves, batched pick, pack & ship)
  • accounting (invoice, payment & billing accounts, fixed assets)
  • manufacturing management
  • general work effort management (events, tasks, projects, requests, etc)
  • content management (for product content, web sites, general content, blogging, forums, etc)
  • a maturing Point Of Sales (POS) module using XUI as rich client interface
  • and much more all in an open source package!
#wget http://mirror.nyi.net/apache//ofbiz/apache-ofbiz-09.04.zip
#unzip apache-ofbiz-09.04.zip  -d /opt/project
#cd /opt/project
#ant run-install
#java -Xms128M -Xmx512M -jar ofbiz.jar
#sh startofbiz.sh
Once OFBiz starts, you can look at the demo storefront at:
http://localhost:8080/ecommerce/

and the administration interface at:
http://localhost:8080/webtools/

You can log in with the user "admin" and password "ofbiz".


Boot Processes Fedora / CentOS /RedHat

The Boot Process

It is also easy to break.
  1. The BIOS loads the Boot Sector (Grub) from Sector 0
  2. The Grub (root line in grub.conf) points to the partition containing the kernel (Linux).
  3. The kernel loads and initializes the devices and runs /sbin/init (process 1)
  4. /sbin/init runs /etc/rc.d/rc.sysinit to initilize devices.
  5. /sbin/init reads /etc/inittab
  6. /etc/rc.d/rc.sysinit run all the scripts int the approach run level directory.

GRUB

Grub is the first step in the boot process and has the greatest Oh ---- factor. But it really doesn't have to be a big problem. You may not need to boot from a live CD to fix this. There are three main parts to boot step
  • root
  • kernel
  • initrd
Try booting and editing each of these lines in GRUB. Purposely make mistakes to learn what errors are produced.
The TAB key will do auto completions when you are editing a GRUB options.

Rescure Mode

Using the first CD to boot into Rescue mode. You can then search for the root file system and mount it to the directory /mnt/sysimage.
  chroot /mnt/sysimage
  grub
Following this command you need to show grub where to read the grub configuration. If the drive type may have changed, maybe because you changed from IDE to SCSI disks you will need to do a --recheck. Then install grub with the install command.
  grub-install --recheck /dev/hda
  grub-install /dev/hda
Redhat will ask if you want to mount the root file system. If you say no you will need to mount the root file system your self. Here are the commands to do this with the VMware system.
  mkdir /mnt/root
  mkdir /mnt/root/boot
  mount /dev/md1 /mnt/root
  mount /dev/md0 /mnt/root/boot

Fixing INITRD Modules

If the kernel is missing or corrupt you will need to reload it from the install CD.
If the initrd file is missing you you can also reload it with the kernel.
Adding missing modules to initrd:
  rm -f /boot/initrd-2.6.18-194.17.1.el5.img
  mkinitrd --preload=xor --preload=raid456 /boot/initrd-2.6.18-194.17.1.el5.img
  2.6.20-1.2320.fc5
Manually changing initrd:
  mkdir /root/initrd-tmp
  cd /root/initrd-tmp
  cp -a /boot/initrd-2.6.18-194.17.1.el5.img ..
  mv ../initrd-2.6.18-194.17.1.el5.img ../initrd-2.6.18-194.17.1.el5.img.gz
  gunzip ../initrd-2.6.18-194.17.1.el5.img.gz
  cpio -i --make-directories < ../initrd-2.6.18-194.17.1.el5.img
  vi init
  find . -depth | cpio -o > ../initrd-2.6.18-194.17.1.el5.img
  cd ..
  rm -rf initrd-tmp
  gzip -9 initrd-2.6.18-194.17.1.el5.img
  mv initrd-2.6.18-194.17.1.el5.img.gz initrd-2.6.18-194.17.1.el5.img
  mv initrd-2.6.18-194.17.1.el5.img /boot

SYSINIT


INITTAB

The file /etc/inittab controls the runlevel the system boots into.
You can override this by added the runlevel you want to the end of the kernel line in GRUB.
id:3:initrdefault:
Changing the 3 in this line will change the default runlevel to the one you want.

Runlevels

Here are the runlevels and what they mean. You should know the by heart too.
  • Run level 1 is single user
  • Run level 2 is Multiuser without NFS
  • Run level 3 is Full Multiuser
  • Run level 4 is unused
  • Run level 5 is X11 windows
  • Run level 6 will reboot the system
/etc/inittab not only starts rc.sysinit it also starts processes that shouldn't die. One of these is the system console/s. It controls which run level the system automatically boots to. The directory /etc/sysconfig hold config files for process started at this level.
RC scripts are kept in /etc/rc.d. The program that run the RC scripts is rc.sysinit. These scripts are what is done when you change run level with the init command.
The fastest to set runlevel services is to use the command 'ntsysv and tell it the runlevels you want to set. For example, this will display and change runlevels 3 and 5.
  ntsysv --level 35
Image:ntsysv.png
To turn on or off a RC script you can also use the command:
  chkconfig --level command on/off
The option --level sets the run level to be change for the command that is turned on or off. This can also be done with the GUI system-config-services.
  chkconfig --list
This command will list all the services and if they are on or off for each run level.
  chkconfig --add/--del command
This command will add or delete a new command from the RC start-up scripts.
After configuring a system like Apache it is easy to forget make it start at boot time. Don't forget to reboot you system before the test is over.
You can debug the RC process by booting into single user mode and running the RC scripts in the run level by hand. You can also bypass init by adding init=/bin/bash the kernel line in GRUB.

CLONING or RESTORING a System

THIS IS NOT NEEDED FOR THE TEST
Here are some of the issues if you are cloning or restoring a system by copy all the files into empty directories and then restoring the boot process. This process involves creating all the required root directories (/ /etc /usr /bin /var /opt /home) and coping all the files back into place with their ownership and permissions maintained. Directories that are not copied include /tmp /dev /proc /mnt. The directories that are not copied do need to be created.
  • The partitions and/or e2 labels may not be the same. This will require changing /etc/fstab
  • Some directories will/may not be copied. This may include /dev. In witch case mounting the root file system with the chroot command will leave you without any devices.
  • Grub.conf (/etc/grub/grub.conf and menu.lst) may also need editing. Both the root and kernel lines may contain references to the wrong partitions.
  • /etc/mtab needs to be edited to match the new disk. Partition numbers can change and sometimes the type, like from IDE to SCSI (hda to sda).
After booting into recover mode with the install CD. You will need to mount all of the file systems into their place under /mnt/sysimage. You can them mount the live proc and dev inplace with the command:
  mount -o bind /dev /mnt/sysimage/dev
  mount -o bind /proc /mnt/sysimage/proc
With the file systems in place you can use the chroot command to create the write environment for fixing the master boot record and Grub.
  chroot /mnt/sysimage

RedHat / Centos minimal services

I always disable most of the services witch are activated by a default Centos 5.3 instalation.

To disable them, run the following commands:
chkconfig anacron off
chkconfig apmd off
chkconfig atd off
chkconfig autofs off
chkconfig cpuspeed off
chkconfig cups off
chkconfig cups-config-daemon off
chkconfig gpm off
chkconfig isdn off
chkconfig netfs off
chkconfig nfslock off
chkconfig openibd off
chkconfig pcmcia off
chkconfig portmap off
chkconfig rawdevices off
chkconfig readahead_early off
chkconfig rpcgssd off
chkconfig rpcidmapd off
chkconfig smartd off
chkconfig xfs off
chkconfig ip6tables off
chkconfig avahi-daemon off
chkconfig firstboot off
chkconfig yum-updatesd off
chkconfig mcstrans off
chkconfig pcscd off
chkconfig bluetooth off
chkconfig hidd off
And you might consider disable this:
chkconfig sendmail off
chkconfig xinetd off
chkconfig acpid off
chkconfig microcode_ctl off
chkconfig irqbalance off
chkconfig haldaemon off
chkconfig messagebus off
chkconfig mdmonitor off

osCommerce Installation on CentOS/ Fedora /RedHat

Welcome to osCommerce!

osCommerce has attracted a large growing e-commerce community that consists of over 239,200 store owners and developers who support each other and extend osCommerce Online Merchant with add-ons being contributed on a daily basis. To date there are over 6,100 add-ons that are available for free to customize osCommerce Online Merchant online stores and to help increase sales.
osCommerce Online Merchant is an Open Source online shop e-commerce solution that is available for free under the GNU General Public License. It features a rich set of out-of-the-box online shopping cart functionality that allows store owners to setup, run, and maintain online stores with minimum effort and with no costs, fees, or limitations involved.

#yum install  mysql mysql-server httpd php php-mysql php-gd php-imap php-ldap php-odbc php-pear php-xml php-xmlrpc phpmyadmin

#service httpd start
#service mysqld start
#mysql_secure_installation (set up root password) 
#wget http://www.oscommerce.com/redirect.php/go,45
#unzip oscommerce-3.0a5.zip -d /var/www/html/oscommerce/
http://youdomain.com


Wednesday, October 20, 2010

Joomla Install on Fedora /CentOS /RedHat

Joomla is an award-winning content management system (CMS), which enables you to build Web sites and powerful online applications. Many aspects, including its ease-of-use and extensibility, have made Joomla the most popular Web site software available. Best of all, Joomla is an open source solution that is freely available to everyone.

#yum install  mysql mysql-server httpd php php-mysql php-gd php-imap php-ldap php-odbc php-pear php-xml php-xmlrpc phpmyadmin

#service httpd start
#service mysqld start
#mysql_secure_installation (set up root password)


Zenoss Installation on CentOS /RedHat /Fedora

This is a how to on installing Zenoss 2.0 core on a new Centos 5.0 installation. This guide assumes a new Centos 5 install with the default "server" software selection, no gui, and has SElinux disabled, if it is not disabled run setenforce 0 as root before starting. If you want to install the old 1.2 version of Zenoss 

#yum -y install mysql mysql-server net-snmp net-snmp-utils
#service mysqld start
#mysql_secure_installation (set up root password)
#wget http://downloads.sourceforge.net/zenoss/zenoss-stack-3.0.2-linux.bin
#chmod 777 zenoss-stack-3.0.2-linux.bin
#./zenoss-stack-3.0.2-linux.bin 


Tuesday, October 19, 2010

Bash function to decompress archives

 extract () {
    if [ -f $1 ] ; then
        case $1 in
            *.tar.bz2)   tar xvjf $1        ;;
            *.tar.gz)    tar xvzf $1     ;;
            *.bz2)       bunzip2 $1       ;;
            *.rar)       unrar x $1     ;;
            *.gz)        gunzip $1     ;;
            *.tar)       tar xvf $1        ;;
            *.tbz2)      tar xvjf $1      ;;
            *.tgz)       tar xvzf $1       ;;
            *.zip)       unzip $1     ;;
            *.Z)         uncompress $1  ;;
            *.7z)        7z x $1    ;;
            *)           echo "'$1' cannot be extracted via >extract<" ;;
        esac
    else
        echo "'$1' is not a valid file"
    fi
}

Port Scan in RedHat /CentOS /Fedora /Ubuntu

#HOST=127.0.0.1;for((port=1;port<=65535;++port));do echo -en "$port ";if echo -en "open $HOST $port\nlogout\quit" | telnet 2>/dev/null | grep 'Connected to' > /dev/null;then echo -en "\n\nport $port/tcp is open\n\n";fi;done

if you need pls change ipaddress and you can add more number 65535 

CentOS /Fedora /RedHat /Ubuntu if disk space is low send mail

PATHS="/export/home /home"

AWK=/usr/bin/awk

DU="/usr/bin/du -ks"

GREP=/usr/bin/grep

DF="/usr/bin/df -k"

TR=/usr/bin/tr

SED=/usr/bin/sed

CAT=/usr/bin/cat

MAILFILE=/tmp/mailviews$$

MAILER=/bin/mailx

mailto="rajat@yeswedeal.com" 

for path in $PATHS

do

 DISK_AVAIL=`$DF $path |  $GREP -v "Filesystem" | $AWK '{print $5}'|$SED 's/%//g'` 

 if [ $DISK_AVAIL -gt 90 ];then

  echo "Please clean up your stuff\n\n" > $MAILFILE

  $CAT $MAILFILE | $MAILER -s "Clean up stuff" $mailto 

 fi

done 

Installing subversion with apache on centos

Subversion exists to be universally recognized and adopted as an open-source, centralized version control system characterized by its reliability as a safe haven for valuable data; the simplicity of its model and usage; and its ability to support the needs of a wide variety of users and projects, from individuals to large-scale enterprise operations.

#yum install mod_dav_svn subversion httpd

#service httpd start

Go to subversion.conf in /etc/httpd/conf.d/. Edit as below 

cd /etc/httpd/conf.d/
vi subversion.conf
 
This is a configuration with username and password for the client  
#htpasswd -cm /etc/svn-auth-conf  rajat --- This command is not needed for the first configuration. 

To create the first user with password 
#htpasswd -m /etc/svn-auth-conf --- use this command to add another user 

Configure your repository 
#mkdir /var/www/svn --- create folder svn 
#cd /var/www/svn --- change diectory to the newly created svn directory 
#svnadmin create repos --- create svn repository named repos 
#chown apache.apache -R repos --- change ownership of 'repos' to apache 
#/etc/init.d/httpd restart --- restart apache

Open you browser and type 'http://localhost/svn/repos'.

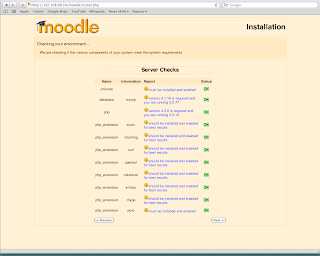
Installation Moodle on CentOS / Fedora /RedHat

Moodle is a Course Management System (CMS), also known as a Learning Management System (LMS) or a Virtual Learning Environment (VLE). It is a Free web application that educators can use to create effective online learning sites.

#yum install  mysql mysql-server httpd php php-mysql php-gd php-imap php-ldap php-odbc php-pear php-xml php-xmlrpc

#service httpd start
#service mysqld start
#mysql_secure_installation (set up root password)
# tar zxvf moodle-weekly-19.tgz
#mv moodle/ /var/www/html/
http://yourdomin.com


vi /var/www/html/moodle/config.php
php  /// Moodle Configuration File

unset($CFG);

$CFG = new stdClass();
$CFG->dbtype    = 'mysql';
$CFG->dbhost    = 'localhost';
$CFG->dbname    = 'moodle';
$CFG->dbuser    = 'root';
$CFG->dbpass    = 'password';
$CFG->dbpersist =  false;
$CFG->prefix    = 'mdl_';

$CFG->wwwroot   = 'http://192.168.68.24/moodle';
$CFG->dirroot   = '/var/www/html/moodle';
$CFG->dataroot  = '/var/www/html/moodle/moodledata';
$CFG->admin     = 'admin';

$CFG->directorypermissions = 00777;  // try 02777 on a server in Safe Mode

$CFG->passwordsaltmain = 't16y.SrDkojXnad5a&<8.Yw!';

require_once("$CFG->dirroot/lib/setup.php");
// MAKE SURE WHEN YOU EDIT THIS FILE THAT THERE ARE NO SPACES, BLANK LINES,
// RETURNS, OR ANYTHING ELSE AFTER THE TWO CHARACTERS ON THE NEXT LINE.