PATHS="/export/home /home"

AWK=/usr/bin/awk

DU="/usr/bin/du -ks"

GREP=/usr/bin/grep

DF="/usr/bin/df -k"

TR=/usr/bin/tr

SED=/usr/bin/sed

CAT=/usr/bin/cat

MAILFILE=/tmp/mailviews$$

MAILER=/bin/mailx

mailto="rajat@yeswedeal.com"

for path in $PATHS

do

 DISK_AVAIL=`$DF $path |  $GREP -v "Filesystem" | $AWK '{print $5}'|$SED 's/%//g'`

 if [ $DISK_AVAIL -gt 90 ];then

  echo "Please clean up your stuff\n\n" > $MAILFILE

  $CAT $MAILFILE | $MAILER -s "Clean up stuff" $mailto

 fi

done
Tuesday, October 19, 2010
CentOS /Fedora /RedHat /Ubuntu if disk space is low send mail
Installing subversion with apache on centos
Subversion exists to be universally recognized and adopted
as an open-source, centralized version control system characterized
by its reliability as a safe haven for valuable data; the
simplicity of its model and usage; and its ability to support the
needs of a wide variety of users and projects, from individuals to
large-scale enterprise operations.
Go to subversion.conf in /etc/httpd/conf.d/. Edit as below
cd /etc/httpd/conf.d/
vi subversion.conf

#yum install mod_dav_svn subversion httpd
#service httpd start
Go to subversion.conf in /etc/httpd/conf.d/. Edit as below
cd /etc/httpd/conf.d/
vi subversion.conf

This is a configuration with username and password
for the client
#htpasswd -cm /etc/svn-auth-conf rajat --- This command is not needed for the first configuration.
To create the first user with password
#htpasswd -m /etc/svn-auth-conf --- use this command to add another user
Configure your repository
#mkdir /var/www/svn --- create folder svn
#cd /var/www/svn --- change diectory to the newly created svn directory
#svnadmin create repos --- create svn repository named repos
#chown apache.apache -R repos --- change ownership of 'repos' to apache
#/etc/init.d/httpd restart --- restart apache
Open you browser and type 'http://localhost/svn/repos'.
Installation Moodle on CentOS / Fedora /RedHat
Moodle is a Course Management System (CMS), also known as a Learning
Management System (LMS) or a Virtual Learning Environment (VLE). It is a
Free web application that educators can use to create effective online
learning sites.
#yum install mysql mysql-server httpd php php-mysql php-gd php-imap php-ldap php-odbc php-pear php-xml php-xmlrpc
#service httpd start
#service mysqld start
#mysql_secure_installation (set up root password)
# tar zxvf moodle-weekly-19.tgz
#mv moodle/ /var/www/html/
http://yourdomin.com


vi /var/www/html/moodle/config.php
php /// Moodle Configuration File
unset($CFG);
$CFG = new stdClass();
$CFG->dbtype = 'mysql';
$CFG->dbhost = 'localhost';
$CFG->dbname = 'moodle';
$CFG->dbuser = 'root';
$CFG->dbpass = 'password';
$CFG->dbpersist = false;
$CFG->prefix = 'mdl_';
$CFG->wwwroot = 'http://192.168.68.24/moodle';
$CFG->dirroot = '/var/www/html/moodle';
$CFG->dataroot = '/var/www/html/moodle/moodledata';
$CFG->admin = 'admin';
$CFG->directorypermissions = 00777; // try 02777 on a server in Safe Mode
$CFG->passwordsaltmain = 't16y.SrDkojXnad5a&<8.Yw!';
require_once("$CFG->dirroot/lib/setup.php");
// MAKE SURE WHEN YOU EDIT THIS FILE THAT THERE ARE NO SPACES, BLANK LINES,
// RETURNS, OR ANYTHING ELSE AFTER THE TWO CHARACTERS ON THE NEXT LINE.


Setup Jinzora media streaming and management on CentOS /Fedora/RHEL
Jinzora is a web based media streaming and management system, written in PHP.
Streaming your media with Jinzora gives you quick and easy access to your online music and video collection from any device with a web browser.
Enjoy your media from your PC, notebook, PDA, Smart Phone, Xbox, PS3 or Wii.
Use Jinzora in Jukebox Mode to control a hardware device like your stereo set or Squeezebox and third-party software, including MPD, VLC and Shoutcast.
Pre-installation
Before you can install Jinzora, you must set up a LAMP server first.
#yum install mysql mysql-server httpd php php-mysql php-gd php-imap php-ldap php-odbc php-pear php-xml php-xmlrpc
#service httpd start
#service mysqld start
#mysql_secure_installation (set up root password)
#wget http://downloads.sourceforge.net/jinzora/jz280.tar.gz
#tar zxvf jinzora-3.0.tar.gz
#cd jinzora-3.0
#mv * /var/www/html/jinzora
#cd /var/www/html/jinzora
#sh config.sh
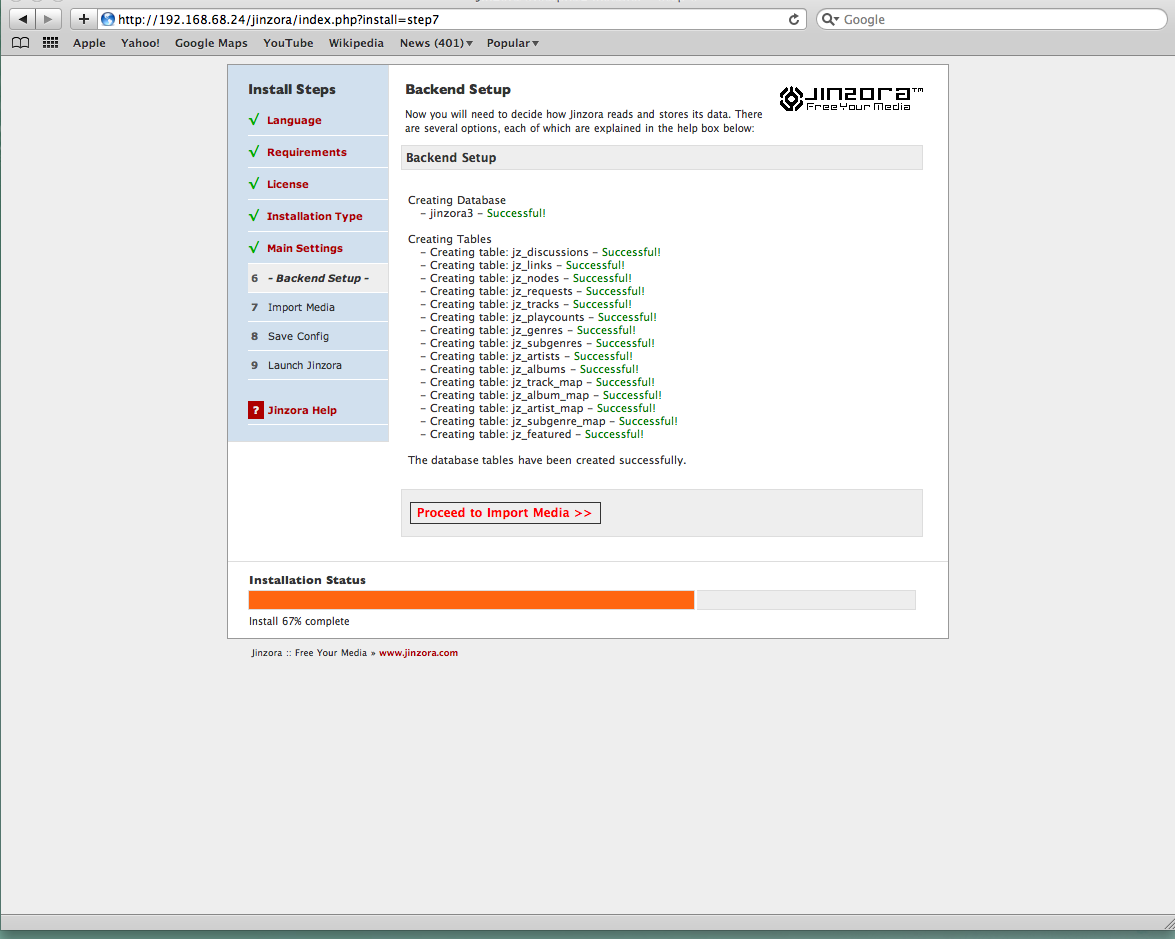
You are now in setup mode.
Please direct your web browser to the directory where you installed Jinzora
and load index.php - you will then be taken through the complete setup
http://yourdomain.com/


 :)
:)
Streaming your media with Jinzora gives you quick and easy access to your online music and video collection from any device with a web browser.
Enjoy your media from your PC, notebook, PDA, Smart Phone, Xbox, PS3 or Wii.
Use Jinzora in Jukebox Mode to control a hardware device like your stereo set or Squeezebox and third-party software, including MPD, VLC and Shoutcast.
Pre-installation
Before you can install Jinzora, you must set up a LAMP server first.
#yum install mysql mysql-server httpd php php-mysql php-gd php-imap php-ldap php-odbc php-pear php-xml php-xmlrpc
#service httpd start
#service mysqld start
#mysql_secure_installation (set up root password)
#wget http://downloads.sourceforge.net/jinzora/jz280.tar.gz
#tar zxvf jinzora-3.0.tar.gz
#cd jinzora-3.0
#mv * /var/www/html/jinzora
#cd /var/www/html/jinzora
#sh config.sh
You are now in setup mode.
Please direct your web browser to the directory where you installed Jinzora
and load index.php - you will then be taken through the complete setup
http://yourdomain.com/


Subscribe to:
Posts (Atom)