Monday, February 6, 2012

DNS configuration on CentOS /RedHat 6.2

Step 1
#ifconfig

 Step 2
# vi /etc/hosts
Step3
# vi /etc/sysconfig/network

Step 4
#vi /etc/resolv.conf
Step 5
#service network restart

Step 6
#yum install bind* -y

Step 7
#vi /etc/named.conf
 Step 8
#vi /etc/named.rfc1912
Step 9
#cd /var/named/
#ls
#cp named.localhost forward.zone
#cp named.loopback reverse.zone

Step 10
# vi forward.zone 

Step 11
#vi reverse.zone
Step 12
# dig dns.mydns-setup.com


Thursday, February 2, 2012

Server’s Serial Number from command line – RedHat/CentOS

To get service/serial number from command in linux run command below. The first result is the service tag which usually in alphanumeric.


[server@dev-test ~] # dmidecode | egrep -i “serial|product”
output example:
Product Name: PowerEdge R710
Serial Number: 378CDE1
……..
Product Name: 0DCR13
Serial Number: ..ABC980CDE4545XYZ.
Serial Number: AB66X66
Serial Number: Not Specified
Port Type: Serial Port 11204A Compatible
……

Wednesday, February 1, 2012

Postfix Mail Server on RedHat 6 /CentOS 6

In this setup:
IP address of server = 161.101.234.62
Hostname = mail
Domain Name = yeswedeal.com
Full Computer name (FQDN) = mail.yeswedeal.com

Note: Make sure DNS Server is properly configured.

Install Required package:
yum install postfix dovecot squirrelmail http  -y

# vim  /etc/postfix/main.cf

inet_interface   =   all
# inet_interface   =  localhost
mydestination =  $myhostname,  localhost.$mydomain, localhost,  $mydomain
home_mailbox =  Maildir/


vim  /etc/dovecot.conf
protocols  =  imap  imaps  pop3  pop3s
mail_location  = maildir:~/Maildir
pop3_uidl_format  =  %09Xu%09Xv
imap_client_workarounds = outlook-idle  delay-newmail  netscape-eoh
pop3_client_workarounds = outlook-no-nuls    oe-ns-eoh

vim  /etc/squirrelmail/config.php
$domain                       = ‘yeswedeal.com’;
$imapServerAddress    = ‘161.101.234.62’;
$smtpServerAddress    = ‘161.101.234.62’;
$default_folder_prefix   = ‘Maildir/’;

service  postfix  restart
service   dovecot   restart
service httpd  restart

Tuesday, January 31, 2012

Linux Easy Admin Utilities For RHEL, FEDORA, CENTOS, OPENSUSE, UBUNTU, DEBIAN, SLACKWARE

The IT Infrastructure Analyst, IT Ops Engg., Systems Admin, IT Support Engg., IT Helpdesk Engg. Companies changes and Job titles change but the responsibilities over lap and mix. My quest to make work fun, simple, joy and easy has lead to write, collect, source and use various scripts and tools that will help in a very easy and fun filled work flow with computers and IT systems.

This project is to write and collect tools and utilities that make System Administration easy and simple. If a hard working Admin cannot have a beautiful wallpaper on his screen then the Admin can at least have one complete set utility tools that make the brow sweat free and achieve deadlines.

The current list of tools:

Password Generator<br> Network & Firewall Auditor<br> Disk Auditor<br> FS Auditor<br> General System Auditor

Download at:

http://code.google.com/p/linux-easy-admin-utilities/
http://sourceforge.net/projects/lnxesyadmutil/

 # wget http://linux-easy-admin-utilities.googlecode.com/files/linux-easy-admin-util-v0.2.tar.gz
# tar -zxvf linux-easy-admin-util-v0.2.tar.gz
# cp easy-admin/* /usr/local/bin/
# adtdepchk

genadtchk - General Audit Checker: This script generates a simple information information about your system. Basic system, Memory, Disk, File System, Network data is audited.
dksadtchk - Disk Audit Checker: This script generates a complete and compressive information about your systems disk and storage. Total disks at boot time, contained partitions, partitions used, removable disks, capacity and free capacity etc.
fsadtchk - File System Audit Checker: This script generates a complete and compressive information about the systems FS usage and current mounted, total available, type, size, free, and space occupying number one folder or file from the FS.
netadtchk - Network Audit Checker: This script  generates a complete and compressive information about the network interfaces - hardware, virtual, local and other , firewall and its status, outgoing firewall status, current process that are having listening processes, port - ip - process - executable table, IPV4/6 feature, forwarding, masquerading for the system.

Monday, January 30, 2012

Install Xserver(windows) and Gnome on Centos/RedHat using Yum

# yum groupinstall "X Window System" "GNOME Desktop Environment"

# yum groupinstall "X Window System" "KDE (K Desktop Environment)"  


#yum groupinstall gnome
 
#yum groupinstall kde

Wednesday, January 25, 2012

ext3 or ext4 partition recover deleted files Centos /Fedora

Extundelete is a utility that can recover deleted files from an ext3 or ext4 partition. The ext3 file system is the most common file system when using Linux, and ext4 is its successor. extundelete uses the information stored in the partition's journal to attempt to recover a file that has been deleted from the partition. There is no guarantee that any particular file will be able to be undeleted, so always try to have a good backup system in place, or at least put one in place after recovering your files!

Download and Install Extundelete:
Download the latest version of Extundelete - http://extundelete.sourceforge.net/

To compile and install Extundelete, you should first install the binary and development packages for e2fsprogs and e2fslibs.  You must also have a C++ compiler and a make utility to compile extundelete.
Go to terminal and type following command to install Extundelete:


#yum install -y gcc-c++ autoconf automake

#tar -xjf extundelete-0.2.0.tar.bz2
 
#cd extundelete-0.2.0
 
#./configure
 
#make

The extundelete program may be run as-is from the build directory, or you may wish to install it to a directory that is shared with other executable programs, which you may do by running the following command: make install

Using 
extundelete:
Assume you have deleted a file called /home/rajat/snap. Also assume the output of the 'mount' command shows this line (among others):

/dev/sda3 on /home type ext3 (rw)

This line shows that the /home directory is on the partition named /dev/sda3, so then run: 
umount /dev/sda3 and check that it is now unmounted by running the mount command again and seeing it is not listed.Now, with this information, run extundelete:
 

# extundelete /dev/sda3 --restore-file /home/rajat/snap/

If you have deleted the directory 'important', you can run: 
 

# extundelete /dev/sda3 --restore-directory /home/rajat/video

Or if you have deleted everything, you can run: 
 

# extundelete /dev/sda3 --restore-all

Thursday, January 19, 2012

Installation TAR lates version on Cent OS /RedHat 4 /5


tar zxvf tar-1.26.tar.gz
cd tar-1.26
./configure FORCE_UNSAFE_CONFIGURE=1
make
make install
cp -f src/tar /usr/local/bin/tar

once log off and login 

Tuesday, January 17, 2012

Ports for RHEV-M


Red Hat Enterprise Virtualization Manager  required following ports.


Port(s)PurposeRemote End
22ssh
  • Used for maintenance of the virtualization hosts.
80http
  • Administration Portal clients
  • User Portal clients
  • Virtualization hosts
  • REST API clients
443https
  • Administration Portal clients
  • User Portal clients
  • Virtualization hosts
  • REST API clients
25285netconsole
  • Virtualization hosts
54321xml-rpc
  • Virtualization hosts
8006-8009xbap
  • Administration Portal clients   

Open the Command Prompt (Run --> cmd ) on your windows machine and run these below script that will open all the required ports .

c:\> for /D %p in 
(25285,54321,22,8006,8007,8008,8009,80,443) 
do (netsh firewall add portopening protocol 
= TCP port = %p name = RHEVM%p) 
 
c:\> netsh firewall set icmpsetting 8 enable

Friday, January 6, 2012

EMC PowerPath basic commands RedHat /CentOS

PowerPath is a multipathing software for Unix operating systems from EMC. If you have ever worked or you are going to work in an environment that includes EMC storage systems it is more than sure that Powerpath will be installed in the Unix hosts.
Following are some notes and tips I’ve been creating since the very first time I found Powerpath, of course this isn’t a full user guide but a sort of personal quick reference. I decide to put it here in the hope that it will be helpful to anyone and for my personal use.

Show powermt command version
Display PowerPath configuration.

 Check for death paths and remove them. List all devices.

Thursday, December 29, 2011

Cluster How to CentOS / RedHat 6.2

Step # 1: Mount an ISO file.

# mkdir -p /media/centos
# mount -o loop /dev/centos6X.iso /media/centos

Step # 2: Create repo config file on both the node.

# vi /etc/yum.repos.d/iso.repo
[ISO]
baseurl=file:///media/centos
enabled=1

Save and close the file

Step # 3: Stop firewall on both node.

#chkconfig iptables off
#chkconfig ip6tables off

Step # 4: Disable Selinux.

#vi /etc/selinux/config
disbale selinux

reboot (if you want)

Step # 5: Add hosts entery on both node.

#vi /etc/hosts
192.168.1.10 node1.clustering.com
192.168.1.11 node2.clustering.com (add this entery to both the node)

Step # 6: Create a ricci user & passwd.

#useradd ricci
#passwd ricci

Step # 7: Install Cluster software.

#yum install cman rgmanager luci ricci (on 1st node)
#yum install cman rgmanager ricci

Step # 8: Start service on both node

#service ricci start (on both the node)

Shutting down ricci:
Starting oddjobd:                                          [  OK  ]
generating SSL certificates...  done
Generating NSS database...  done
Starting ricci:                                            [  OK  ]

#service luci start (on 1st node only)
service luci restart
Stop luci...                                               [  OK  ]
Start luci...                                              [  OK  ]
Point your web browser to https://centos1.clsutering.com:8084 (or equivalent) to access luci

Step # 9: Open the firefox.

https://192.168.1.10:8084/

login as root & root passwd

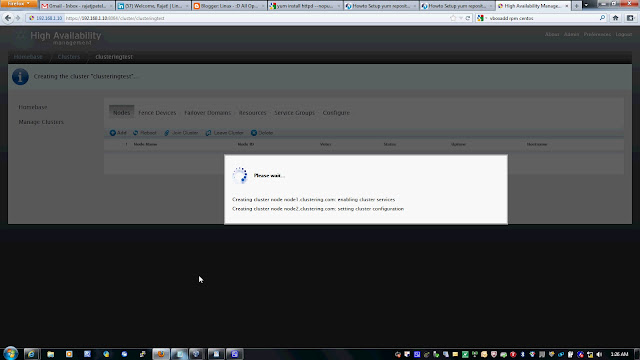
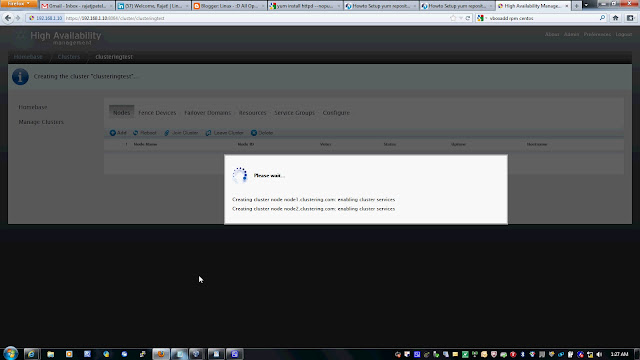
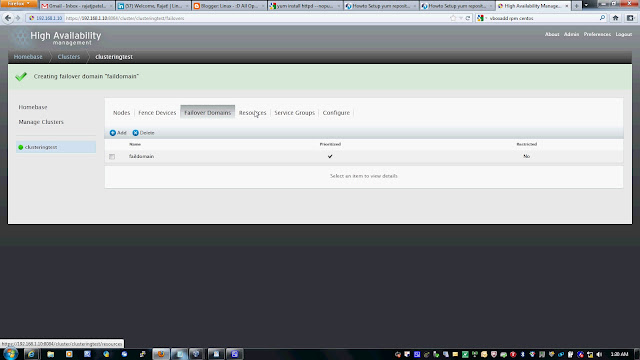
Follow the snap short or you watch youtube to create a Cluster on following link